Smaller stocking for Head Start is at the bottom
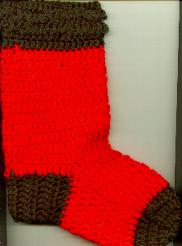
This pattern works up quickly and looks great. I like to use the same color
for the toe and heel and then do stripes through out as the need or want
arises. It makes the stocking look more interesting and uses up a lot of
scrap Christmas yarn.
Materials:
Assorted Christmas colors of worsted weight yarn
G hook
Note: The toe color could be changed after row 4 to the body color.
Ch 4, join with a sl st to form a ring. Ch 3.
Rnd 1: 12 dc in ring, join with a sl st in top of ch 3.
Rnd 2: 2 dc in each dc around. Join as before. Ch 3.
Rnd 3: 2 dc in 1st dc, *1 dc in next dc, 2 dc in next dc; repeat from * around ending with
1 dc in last dc and join as before. Ch 3.
Rnd 4 - 12: 1 dc in each dc. Join as before and ch 3.
Change for heel:
Row 13: 1 dc in each dc to within last 12 dc. Ch 3 and turn.
Row 14 - 19: Repeat Row 13 by doing 1 dc in each dc of heel row. Fasten off, fold heel in
half right sides together and sew up the back of heel for the seam.
Change for body:
Attach yarn to heel at seam line. Ch 3.
Rnd 1: 1 dc in joining and 13 more evenly spaced around heel rows to 1st free dc of instep, dc in each instep dc; 14 dc evenly spaced around heel rows. Join with a sl st to 1st dc. Ch 3.
Rnd 2 - 21: 1 dc in each dc. Join as before and ch 3 making sure to do a ch 10 for hanging in the position you want it in the last row. Fasten off and weave in ends.
Here is the same pattern but edited to make it a smaller and more managable stocking.
Picture at the bottom(13" x 9")approx.
Materials:
Assorted Christmas colors of worsted weight yarn
H hook
Note: The toe color could be changed after row 4 to the body color.
Ch 4, join with a sl st to form a ring. Ch 3.
Rnd 1: 8 dc in ring, join with a sl st in top of ch 3.
Rnd 2: 2 dc in each dc around. Join as before. Ch 3.
Rnd 3: 2 dc in 1st dc, *1 dc in next dc, 2 dc in next dc; repeat from * around ending with
1 dc in last dc and join as before. Ch 3.
Rnd 4 - 11: 1 dc in each dc. Join as before and ch 3.(24 dc + 1 ch 3)
Change for heel:
Row 12: 1 dc in each dc to within last 10 dc. Ch 3 and turn.
Row 13 - 16: Repeat Row 12 by doing 1 dc in each dc of heel row. Fasten off, fold heel in
half right sides together and sew up the back of heel for the seam.
Change for body:
Attach yarn to heel at seam line. Ch 3.
Rnd 1: 1 dc in joining and 28 more evenly spaced around. Join with a sl st to 1st dc. Ch 3.
Rnd 2 - 15: 1 dc in each dc. Join as before and ch 3 making sure to do a ch 10 for hanging in the position you want it in the last row. Fasten off and weave in ends.
The last few rows you can change to personalize the stocking